Topics
Spitfire Chassis Drawing
Spitfire Chassis Dimensions
My Favorite Links
Vic's Spitfire
Home Page
Site Index
Images and photos contained in this web site are held in copyright and owned by Vic Whitmore, unless otherwise indicated.
This site is best viewed with screen resolution set to 1024 X 768 using Netscape 4.x or Internet Exploder 4.x or later versions.
Spitfire Technical Information
|
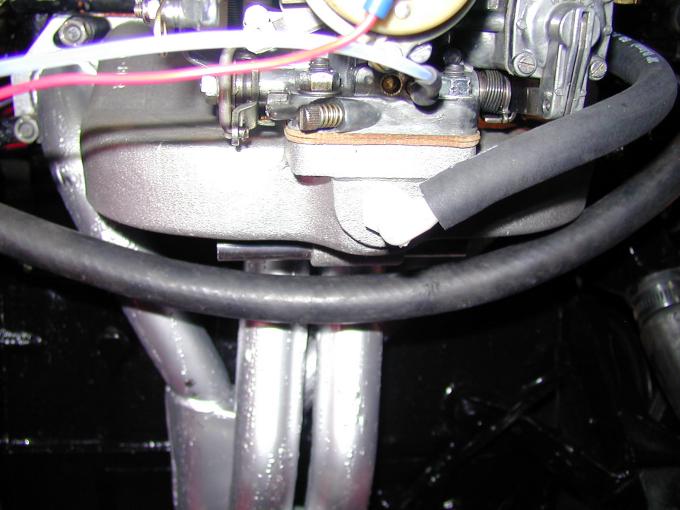
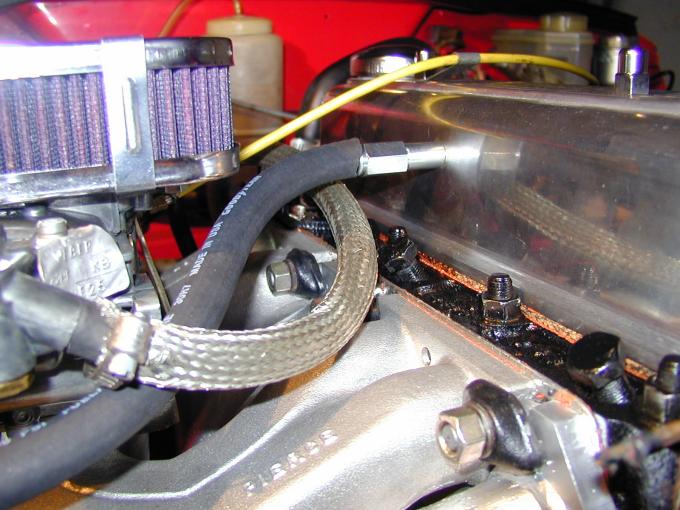
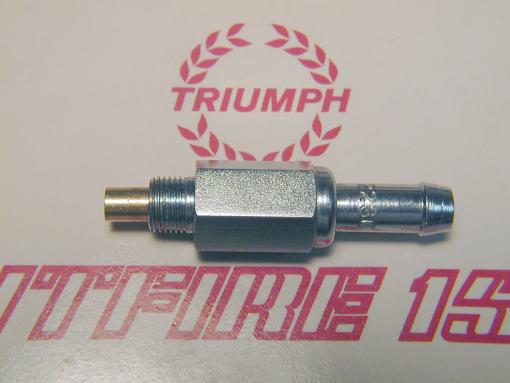
Spring is here as I create these web pages so my time will be spent mainly on my current Spitfire projects. The web pages will have a lower priority but I will add to these pages whenever I have some spare time. Oops... and then summer will come and driving and events and weekends at the boat will take precedence. When will these pages ever get finished? Weber DGV InstallationI have successfully transplanted the Zenith-Stromberg carb with a Weber DGV. There are two big problems to solve. The first is having the right intake manifold. While the Cannon manifold fits fine and works for some people, it also causes the air filter to hit the hood. That was my case and several other people have reported the same problem. Why it works for some but not others is left for conjecture. This problem was solved by using the Pierce manifold which has a greater offset, enough for the air filter to clear the hood. The second problem is replacing the valve cover breather line that connects to the large vacuum port on the Z-S. Without a way of relieving the crankcase pressure, oil will spurt out the dipstick. While others have solved this by adding a vent on a plate that replaces the fuel pump (using electric fuel pump) and attaching a catch can, I choose a little cleaner solution. You need to tap and thread a hole onto the flat face of the intake manifold, just below the carb mounting flange, and install a barbed fitting. Connect this barbed fitting to the valve cover. For testing purposes, I ran the car with this direct connection without oil leaks. With that problem solved, I wanted to add PCV valve in between to make it operate like a typical setup. However, after some test runs, I found oil leaking from the dipstick again, so the PCV valve must have been too restrictive at higher RPMs (didn't leak at idle). I removed the PCV valve and returned to the state where there was no oil leaks. The problem was that the idle mixture could not be set right and still have the idle RPM right. The intake manifild was sucking in too much air and when the idle mixture was set to slightly rich, the idle would hover at about 1200 RPM. So I took a lesson from my son who has an 86 Jaguar. They use a restrictor orifice in the PCV line. I experimented with various orifice sizes and found that about 1/8" was just right and the idle mixture could be set right even while idling at 500 RPM. I did not go smaller than 1/8" as I was happy with the idle and the dipstick didn't leak. Problem solved. Here is a picture of front face of the manifold, tapped with a 1/4"-18 NPT, connecting to 3/8" hose. Here is a side view showing the connection to the valve cover, including the PCV valve(since removed). Hats off to Trevor Boicey for his support on this idea. I will post more info on my engine and exhaust mods in the near future. Tank PanelHere is a template for the gas tank panel for inside the trunk (boot).Just "right click" on it to save it. 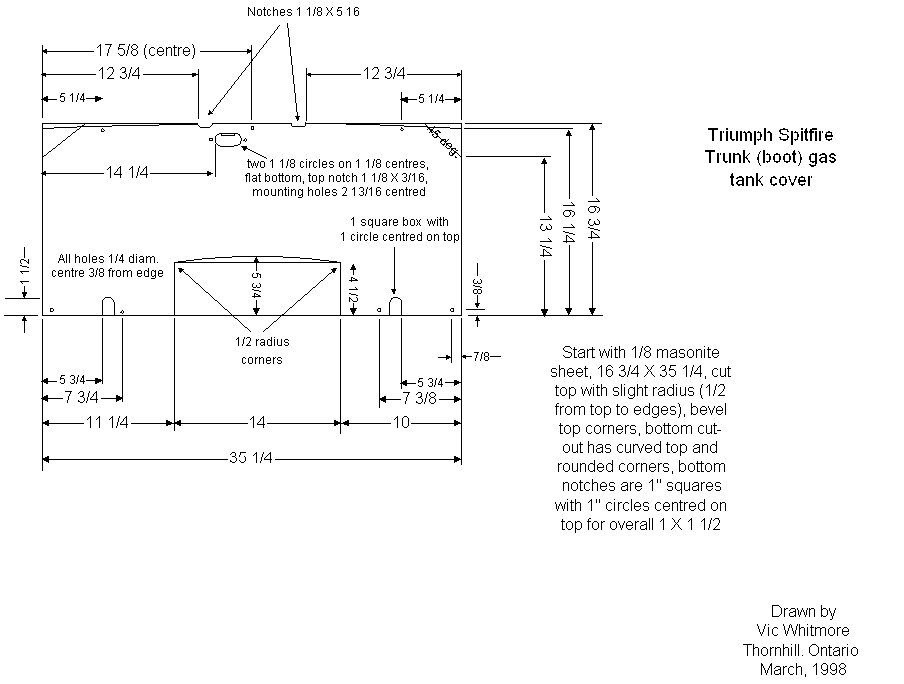
...more to coming laterThere will be Spitfire pictures and graphics. You will be able to download a copy of the Competition Manual. There will be a list of my favorite Spitfire links. *** DONE *** There will be text and pictures on:
|